Tally 9 Lesson 3 - Accounts Master
After company creation & configuration, first you should create the necessary Masters for Ledgers and Inventory Items.
Masters are placed under 2 Menu Items at Tally 9 Gateway, namely

- Accounts Info
- Inventory Info
The common fields in all the masters are explained below.
Name: to enter Name of the Master. You can enter long names (51 Chars. Max.)
Alias: It is an additional name for the Master, a sort of nickname. For example, If you call any Ledger or Group or any other Master by another name, enter it. You can select the item either by name or by Alias. For example, sometimes you refer to the ledger ‘Bharat Sanchar Nigam Limited’ as ‘BSNL’, so in name give Bharat Sanchar Nigan Limited and BSNL as alias. If you use codes, you can give Codes in alias. You can create multiple aliases for one master. Alias is optional, and you can leave it blank.
Single & Multiple Masters
Except for Budget, Voucher Types, Currency and Unit of Measure, for all other Masters under Accounts Info and Inventory Info menu, Tally 9 provides twin options for Creation, Alteration and Display, namely (1) Single option (2) Multiple option. In Multiple option all normal fields for multiple masters appear in columnar format – a convenient way to create many masters at one go. In Single option, you create each Master Individually.
Conversion of Name
When you type in lower case, Tally 9 automatically converts the first letter of every word of the name to upper case, to save time in typing. So, you may conveniently type a abc & co. and Tally 9 will convert it into ABC & Co.
Duplicate Name
You can not create duplicate masters or duplicate aliases. An alias of one master can not be the name of another master. While considering duplicates, Tally discards some punctuation marks (like -,/,(,)). So ABC (Pvt) Ltd A.B.C Pvt Ltd are same.
Accounts Info

Each menu has sub-menus. Let’s view all the menus and sub-menus that are available under Accounts Info menu before taking up options individually

Groups
Single Group
- Create
- Display
- Alter
Multiple Groups
- Create
- Display
- Alter
Ledgers

Single Ledger
- Create
- Display
- Alter
Multiple Ledgers
- Create
- Display
- Alter
Cost Categories

Note: This Master is not activated by default. Go to features (F11) -> Accounting Features - > Give Yes to Maintain Cost Centres.
Single Cost Category
- Create
- Display
- Alter
- Create
- Display
- Alter
Cost Centres

Single Cost Centre
- Create
- Display
- Alter
Multiple Cost Centres
- Create
- Display
- Alter
Budgets

Note: This master is not enabled by default. Go to Features (F11) -> Accounting Features -> Maintain Budgets and Controls
- Create
- Alter
Currencies
Note: This master is not enabled by default. Go to Features (F11) -> Accounting Features -> Allow Multi-Currency:Yes
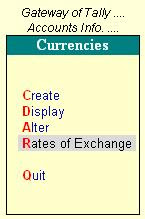 Create
- Display
- Alter
- Rates of Exchange


- Create
- Display
- Alter
Here is an explanation about Masters under Accounts Info menu
Accounts Group: Account Groups for classification of accounts. A set of pre-defined Groups are already available. Your created Group can be placed under any of the pre-defined groups or you can also create primary group. You can nest Groups up to any level.
Ledger Accounts: ledger accounts are the only essential masters for entering Accounting transactions.
Cost Centeres: Cost Centres allocate the figures of ledger accounts into entities like Departments, Projects, Salesman, etc
Cost Categories: Cost categories provide parallel Cost Centres, to allocate figures into many Cost Categories
Budget: You can set multiple budgets, compare against actual & get variances.
Voucher Type: Tally 9 provides some pre-defined voucher types, which in normal cases are good enough to record all types of transactions. However, you may add more sub classification of voucher types under any of the pre-defined voucher types. Enter your own voucher types through this part.
Now we will have a look at Accounting Features in Tally (F11:Features):
What is Maintain Bill-wise Details Feature?
If you want to maintain Bill-wise break-up for any ledger, set Yes, then this feature will be activated and you will be prompted to specify individually when you create any ledger whether you wish to maintain Bill-wise details for the ledger.
(for Non-Trading Accounts also?)
If you want Bill-wise tracking for other accounts also (besides Sundry Creditors & Sundry Debtors), set Yes, then this feature will be activated and you will be prompted when you create any ledger whether you to maintain Bill-wise details for the ledger.
Normally you need the Bill-wise details only for Sundry Debtors & Creditors. So, to keep things simple, set this option to No.
Maintain Cost Centres?
Respond Yes if you want Cost Centres, then Cost Centres will be activated and will be made available in Accounts Info Menu.
Use Rev. Journals?
Respond Yes if you want to use Reverse Journal Vouchers, then it will be available in Voucher by pressing F10.
Reverse Journals are needed to make Transient Journal Vouchers to get intermediate PL & Balance Sheet, after adjustments like Liabilities, Interest, Depreciation etc. you do not need to set this option just to get Monthly / Quarterly Trial balance etc.
Use Debit / Credit Notes?
Respond Yes if you want to use Debit and Credit Note Vouchers, then it will be available on pressing F9 and F8 in Voucher Entry Screen.
(Use Invoice mode for Credit Notes?)
If you want to enter Inventory details first from which the accounts data for Credit Not is built up, set this option to Yes, otherwise set No.
Activate Interest Calculation?
To calculate Interest for Ledger Accounts, set this option to Yes, to activate the Interest Calculation Option.
(Use advanced parameters?)
This options allows to set special rules for Interest Calculation
Normal and Advanced Information
Information in Masters are classified into 2 modes: Normal and Advanced. Normal information can always be entered. Advanced Information can be entered only if ‘Allow Advanced entries in masters? Is set to yes in Accts / Inv Info under F12: Configure
Note: The changes you carry out in F12: Configure are global, that is it will be effective for all companies you are working with Tally. So if you are working with multiple companies changing a Configuration will affect all companies whether you want or not.
0 comments:
Post a Comment